пятница, 1 февраля 2013 г.

10 most noticeable outages of Cloud Computing in 2012


Year 2012 has ended just recently. What a year it was for Cloud Technologies? Not the best one out there. Lots of cloud consumers lost money, time and serenity in different situations, caused by cloud providers. As a result, clouds had a negative influence on their reputation.

I think that it is too early to say that Cloud is a reliable and smart source to store your data. At least, as is. Continued outages have contributed to the feeling that businesses shouldn't put their core assets in a public cloud, and as a result, cloud vendors in 2012 ramped up sales of hybrid cloud services, enabling companies to manage their own private clouds.

Outages hit cloud hosting companies with regularity, creating a sense that they are no longer extraordinary events, but rather a normal part of the cloud computing business model.
Let us look at 10 top cloud failures in 2012.

четверг, 14 июня 2012 г.

History and vision of Nimbula Director


I decided to write about Nimbula, because it is practically the only Virtual Hosting provider that I closely worked with. As I was testing a solution that is based on Nimbula while working in EPAM, I currently have some thoughts to share about it. So, let's start with the overview of what it is.
Based on information from this page, Nimbula is a relative of Amazon Web Services. If we take a look back, we may find that Chris Pinkham, co-founder of Nimbula, was an Amazon engineer in early 2000s. And it was his idea to create an infrastructure layer for web-scaled Amazon platform, which later extended to public in 2006. The whole idea was to drop down costs and decentralize the infrastructure by providing services to development teams. By no means Pinkham thought it was only Amazon that he was developing and building the service for, he hoped it would expand to developer teams all over. So the first and basic virtual-hostingAmazon EC2 service was developed by Pinkham and other engineers, including Christopher Brown and Willem Van Biljon in a satellite office. Just as it was ready and started to be involved in real-life activity, hosting and development, they realized it can become a meaningful business. Further history of success for Amazonis pretty clear and can be found online, if needed. However a major point is the split of two company-level-headed directions, but not the cloud architecture ones. For whatever reason, Pinkham eventually leftAmazon for Nimbula, a service and company that practically brings AWS to private cloud.
Let's take a closer look at differences and similarities between those two:
Nimbula utilizes the same concept for launch plan as Amazon, which allows you to create multiple instances of same configuration and launch them simultaneously. By the way, it is interesting to mention here a small off-the-scope tool that takes utilization of launch plans even further. It allows you to run multiple instances with different configuration, shape and machine image and is being developed by EPAM Systems, Inc.. The name is Orchestrator. It gives you additional flexibility in one-click configuration of base environments where a combination of different machines is possible.
Next is using a set of preconfigured image lists to launch instances based on. Nimbula and Amazon have sets of different OS types which are being installed on previously launched instances, those like Linux or Windowsimages. Both allow for adding new custom machine images that might have unique configuration and were created by you.
Similarities also include security rules and lists regulating connection to your instances and communication between them. For example if you have a public IP assigned to your instance, which is another service fromNimbula and AWS, you can set rules for accessing this machine.
If you require a secure, reliable and persistent volume, attached to your instances, both companies provide that ability. The only difference you can find is naming for those services.
You can take a more detailed look at all Nimbula technical capabilities here.
On the other hand, Nimbula introduced user groups to make its services more valuable for private customers, which is pretty logical.
Over the time Nimbula has improved its services and reliability. They added comprehensive CLI tools, started to support NAT services since ver. 1.5 as well as features. Those interested can check out the full information on versioning and release history here.
By releasing ver.2.0, Nimbula has unified itself even more. Addition of VMware support as well as AWS API utilization stand for that point. However, there are valuable improvements and additions, worth looking at.
As you can see, Nimbula has many similarities to AWS, so if you are an Amazon customer and ever thought about moving your infrastructure to a private cloud, you might want to take a closer look at Nimbula as your application's architecture will not have to be changed dramatically due to many crosschecks in these two. In addition to that - some of Nimbula's "out of the box" services are charged for by Amazon. Simple virtualization is packed by additional storage volume and many other services. At the same time, the costs are sometimes even lower which is explainable due to private direction of Nimbula.
If we take a look at names and brands, which are already hosting their environments with Nimbula, we can find the US Government and a Russian company that operates on Internet market. From here we can understand that Nimbula is a serious player on the Cloud market. Surely, there are still problems to deal with. And head problem is that Nimbula is accessing the potential market too slow and too late. I mean, players like AmazonAzure and VMware have already split the cake and each has its own set of clients. It's really hard to make it to the market and become a valuable player with competitors like that.
This is where Nimbula should become unique. It has to come up with a solution and quality of services that can beat and surpass those, offered by competitors. I mean, in your marketing and sales support you cannot always rely on a fact, that your product was developed by a former AWS big player. There has to be a feature or a set of them making Nimbula one of a kind valuable Cloud service, interesting for customers.
As a conclusion, I would say that looking back at history and understanding the role of Nimbula's founder in developing now successful Amazon EC2, you can be sure it is worth looking at. Technology, concept and services are basically the same, which makes back-n-forth migration possible. At the same time, Nimbula lacks something new and valuable to introduce. In my opinion, right now it is "just another" Cloud IaaS provider.


EXPLORING THE CLOUD USING ORCHESTRATOR


You might have read my post about setting up your own instance in Cloud using Amazon Web Services (AWS). Well, recently I started a little research project that required me to use 2 machines in Cloud. One with Windows Server and another with SQL. I need them to be fast, reliable and stable, as well as a possibility to run clones of this environment easily.
EPAM Cloud has caught my attention in scope of my goals. They say I can have access to my environment anywhere, login with PMC credentials to view current status, and start or stop instances even from my iPhone. Sounds pretty awesome!
There is a so called 'Four Buttons' activity introduced in scope of managing environment under EPAM Cloud. Actually, EPAM's Cloud solution is called EPAM Cloud Orchestration Framework or Orchestrator.


So anyway, Orchestrator was designed to accommodate every single thing you need to manage the Cloud. And manage it on your own, control it, monitor and support it on the go, without any additional skills or software needed.
It's a little different from Amazon Management Console, which is reasonable. The whole ideology of EPAM cloud is there are four main actions in managing your own environment - Activate, Setup, Start and Stop.


First of all you need to Activate your project, that's what they call it. In reality, you just fill in the so called 'Onboarding Activation Form', and send it to one of Consultants or Datacenter Admins. The form is simple, there is no need to provide an example here, all that is been asked are your contacts and a name for the future Cloud of yours. In a few hours they will provide you with link to the web site and credentials for access.
You log in and what you see? Really simple user interface. I like the colors, like the design, it looks fresh. It's always good to work with good-looking software, isn't it? Well, that is the case here. Back to the point however. In your initial email, with that Activation Form, you might have also stated the configuration you want, like OS type, Shape of instance and their quantity, etc. If so you'll be able to see it running by now. But that is not interesting, right? I want to do it on my own, want to change it the way I need to. That is the whole point!


So I start setting it up. To do it, just click the Setup button and a friendly wizard will pop-up. I have to say here, that Help materials on every wizard are really comprehensive and explanatory. Basically, right now you are creating a Template of Cloud Hosting Plan, which contains the info about your instances and services, monitoring policies, login credentials and storage sizes. This Template is saved so it can be re-used again if needed and I find it very handy. Who knows what can go wrong, right? And if something does go wrong, environment can be re-launched or cloned with one click.
I'm not going to guide you through the whole process of setting up the Template, why? I will just say that every step is dedicated to single selected service that you need to configure. It's all done with clicking on checkboxes to enable/disable something. Or adding rows with predefined Network Protocols to Security Lists for example. And sure selecting amount of storage you need as well as OS type. It is all very easy and no special skills required.


However, there is something important about Templates. On Step 1 you select it to be Static, Dynamic or Custom. Static means that you will set up the environment, run it and will NOT be able to scale it. If you need it scaled you going to have to build it from scratch again. Dynamic allows for scaling, adding and removing things, so if you need that in the future, choose this option. Custom is designed to give you more flexibility when you switch the ignition and power up, like entering Load Balancing IP or choosing additional storage size for every instance.
I actually like the whole idea with wizards, it gives you the same feeling as when you are new to some software that you want to use, still it has to be configured previously and you don't really know how it's done. But the wizard is there to help you. I feel more relaxed in these, because I know I cannot break something.


When you done and saw the Successful message, you can proceed to actual run of your environment. Just as it was with Setup, it's a Run Wizard. Depending on what Template you used, you will be asked for some additional configuration or just for a Stage name. Stage can be referred to an environment with multiple instances under it, like a QA Stage or DEV Stage. Sure, no one is restricting you with names, enter anything you want.


And there you have it! Running instances. Configured, monitored and shaped just as you want them to be. You can view their network and CPU load statistics on the Monitoring Tab from Orchestrator; you can access them with single click from Management Tab with Console button or report an incident if something's malfunctioning. Really easy, very user-friendly and smooth.
Want to perform instance change, like adding additional storage or changing its Internet IP? No problem, Change wizard is there to help you. Want your colleagues to have, let's say, restricted access to this console? You name it, Users wizard here. Even logs and events can be viewed from here. Trust me, it is awesome.
In comparing to using AWS and Orchestrator I liked the later better. I mean, come on, I don't always have my laptop or a 22-inch screen computer available for solving things with running environment, and that's where Amazon can't help me, its interface barely usable from any mobile device. Orchestrator on the other hand lets me utilize everything from iPhone in my pocket, anywhere, which is really cool! Also, AWS is too big, it's costly and enforces you to read a lot of guides and documentation. I don't really want to do that, don't want to remember all of specific terminology and Service Names. And that is where EPAM Orchestrator has a better approach with wizards and list of events. At the same time it's just as elastic, flexible, reliable and scalable as Amazon.
Finally - the Stop action. If you want your instances stopped, just choose its name from the Stop wizard drop-down menu and click the button.
Like I said, easy, good-looking, stable and safe. That's all about EPAM Cloud Orchestration Framework. I had great experience using it and will continue to do so. Thank you for reading!

четверг, 19 января 2012 г.

Explore the Cloud. Part Two.


Continuing my previous post here, we start by selecting a Windows AMI to run our instance. Second page of the wizard is an overview of instance settings and you don’t really need to change anything here, just check out the information and proceed to the next step

Next step is creating a so called Key Pair. Amazon uses its own security features and a Key Pair is a security credential similar to a password, which you use to securely connect to your instance after it's running. Because we are doing it for the first time, we will need to create a new Key Pair. To do so enter a name for it which will stand for a private key filename associated with the pair on Amazon side, the .pem extension file. Now simply click the “Create & Download your Key Pair” button and save the file on your computer. Note the location because you'll need to use the key soon to connect to the instance.

Following page is Firewall Configuration. Here you can create a security group that defines firewall rules for your instances. These rules specify which incoming network traffic should be delivered to your instance (e.g., accept web traffic on port 80), while all other traffic is ignored. I have to say here that Amazon is great and easy to use, because you basically don’t have to do anything here, a new group with appropriate setting and the quick-start-1 default name is already created for the type of instance you selected in step one. Image shows the rules for Windows AMI that I’m using.

Next step is to review the settings and finally launch our newly created instance by clicking the Launch button.


Easily click the Close button which will return you to the home section of your Management Console EC2 tab. Hooray, your instance is running! You can see it under the My Resources section of your Management Console.

To advance, click the instance and you will be taken to its settings page. Information that you need here is Public DNS because you'll need it for the next task. Copy and paste it somewhere or just record it.

Now we will try to connect to our instance for the first time. Remember that Key Pair file you’ve downloaded earlier? Well, its time has come. Navigate to the folder where you downloaded it and open the file with any text editor on your computer, e.g. Notepad. Copy the entire content of the file to the clipboard.

Open your AWS Management Console and navigate to the Instances page. Right-click on your instance and select the Get Windows Password option.

A new dialog will open, asking you to provide your private key in order to receive your default Windows Administrator password. Paste the contents of the Security file you’ve copied earlier into the given field and click the Decrypt Password button. Same window will reveal you the password. Save the password because as you might have understood you will need it to connect to the instance.


What you will need to do next is to start the Remote Desktop application that is most easily accessed from Start menu > All Programs > Accessories > Remote Desktop Connection. Enter the Public DNS name of the instance that you’ve saved earlier and try connecting to it.

If everything is fine, and I’m sure it is provide the Administrator as username and password that you’ve decrypted earlier to connect to the instance.

And look, here we are, a login screen followed by a desktop of our Amazon EC2 instance! Isn’t that truly awesome and easy?

You can now start working with instance as you would with any Windows Server. However I would recommend you to change the Administrator password first for security purposes. I will sure do that because of the images in this post that reveal my password to you. And remember to keep your personal information like passwords safe. Enjoy the full possibilities of Clouds and thank you for reading!

вторник, 17 января 2012 г.

Explore The Cloud. Part One.


I’ve heard a lot about Cloud services. Things like infinite capacity, flexibility, unlimited system and data resources. Those stand for “professional” clouds, the ones used by businesses and companies around the world. When it comes to private Cloud services, we hear that all of our pictures, videos and music can be reached from anywhere, from any device that has internet access. This sounds cool, doesn’t it?
So I’ve decided to check it out myself and see how the cloud works, how easy it is for anyone to create his own Cloud with a website in it for example, or any other user service. The choice of what you will use it for is up to you.
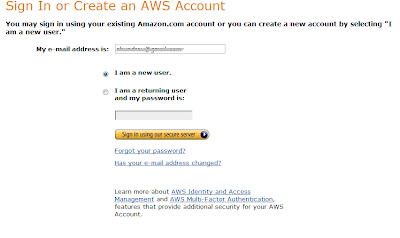
Let’s try creating an Amazon Elastic Compute Cloud (EC2) server. You will have to register an Amazon account for this and even if you do already have an account that’s used for Amazon purchases, confirmation of your email and personal data is required.


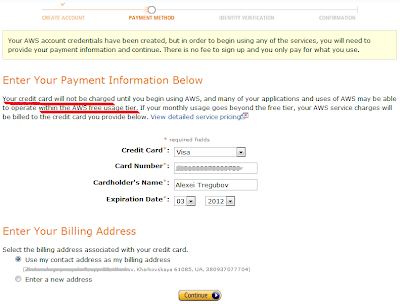
 Registration is simple and there is nothing special about it except that you must provide a valid payment method in order for your account to be activated later, although Amazon has great terms for newcomers and all of its services are free for 12 months since registration date.

I live in Ukraine, and Amazon asks for your phone number in order to verify you are human. Cool thing about it is that you will actually receive a call from United States and will have to type a four digit number using your phone’s dial pad to make a confirmation. If it can be done from Ukraine, I bet you can do it from any country worldwide.

Once you complete the registration process and receive an email, confirming that your payment method is valid, you can start setting up your services right away from the Amazon Web Services (AWS) Management Console. 
AWS Management Console is like an admin panel, where you can view all of the information associated with your Cloud.  
By the way, Amazon has some great Getting Started guides that allow you to get running in no time even if you are not familiar with specific terminology used in Cloud Services. This documentation can be accessed from the same AWS Management Console I was talking about earlier.
So, to start running you must first set up your own virtual server, which is referred to as an Amazon EC2 instance. Considering the fact that we are using the so called Amazon Free Usage Tier, you can only launch a micro Amazon EC2 instance. Micro instances provide a small amount of consistent CPU resources and allow you to burst CPU capacity when additional cycles are available. They are well suited for lower throughput applications and web sites that consume significant compute cycles periodically.
        For requesting an instance you have to click on the corresponding button in Management Console and follow the appeared wizard instructions. First step is choosing the Amazon Machine Image or AMI. An AMI contains all the information that AWS needs to create the instance. You can choose from either Linux-based AMIs or Windows, whatever is more comfortable for you. Here is the illustration of how the Getting Started and Instance Launch buttons look:


       Next image shows the Wizard window that is launched once you click the button. To keep things simple, AWS marks the AMIs that are available in the free tier with a star.
         On the next post I’m going to start by choosing a Windows Server 2008 R2 Base AMI and see where this goes.